Do-it-yourself ways to create paper furniture, schemes and important nuances
In interior decoration, paper furniture is in demand - simple figures can be made with your own hands. Another area of application of these items is toys for children. Each child will want to have a dollhouse, where there will be beautiful paper furniture, made by hand. To make such products, you do not need additional origami skills, you just need to follow the instructions.
Necessary tools and materials
Origami furniture is an interesting area that requires special attention. Making such figures does not take a lot of time, and the resulting result pleases with its appearance of adults and children. The main feature of the products is maximum resemblance to real headset items: sofas, tables, cabinets, armchairs and chests of drawers.
Using such furniture in real life is unlikely to succeed, however, items will be a good option for creating a layout of a future room or designing a dollhouse. To achieve similarity with real furniture, the design uses texture paper that simulates various surfaces: stone, leather, fabric, wood and metal. When creating objects, it is better to use paint, which does not completely impregnate the material, but only gives it color.
The following materials are used for manufacturing:
- The base material is matchboxes, a little corrugated cardboard, colored thick paper;
- Pieces of fabric, decorative film and texture paper for finishing finished objects;
- Scissors;
- Pencil or pen in black;
- Glue PVA or any other for working with paper.
You can work with paper yourself, or you can connect loved ones to the process. Then the resulting products will be diverse, but together make up a single ensemble.

How to make the following options
You can make anything from paper. You just need to show imagination and perseverance. Consider master classes in the manufacture of popular types of furniture. Based on detailed instructions, you can make other types of home decoration. The most popular are:
- Sofa;
- Chest of drawers;
- Armchair;
- Cupboard;
- Table.
To learn how to properly design paper furniture, you need to consider each option individually.
Sofa
A paper sofa will look great both in a dollhouse and in a miniature copy of a real interior. Before you begin, pay attention to the paper size:
- For miniature options, it is worth choosing 10x10 cm colored paper;
- For execution in medium sizes, it is necessary to give preference to a workpiece of 20x20 cm;
- To create a large sofa, the dimensions of the material are proportionally increased.
The color of the paper is chosen at will, but it is better that it fits into the future interior or imitates real furniture. Having picked up the materials, you can begin to manufacture:
- The square sheet is folded in half, after which it is opened and folded perpendicular to the first;
- The next step will be an additional hem. The lower edge is wrapped to the midline of the fold, then folded again. The output is 3 fold lines, not counting the center;
- The lower thin strip is wrapped in the first fold, after which two identical triangles are laid off by folding the side parts diagonally;
- The accordion is folded to the end, and the upper part of the workpiece is bent to the middle. The workpiece is turned over;
- The lower corners in turn are bent up, and the upper ones are bent down diagonally;
- The workpiece is again turned over, bending one corner inward. So the back is formed.
Turning the product over, you need to form the legs of the sofa and it will be ready. Such a beautiful and original item will become a real decoration for a toy living room or an original art object.
 Bend the sheet in half
 Again in half
 We make three bends from below
 Making corners from below
 Raise the lower part
 We make bends to the side
 Align the back
 Make the legs
 Ready product
Chest of drawers
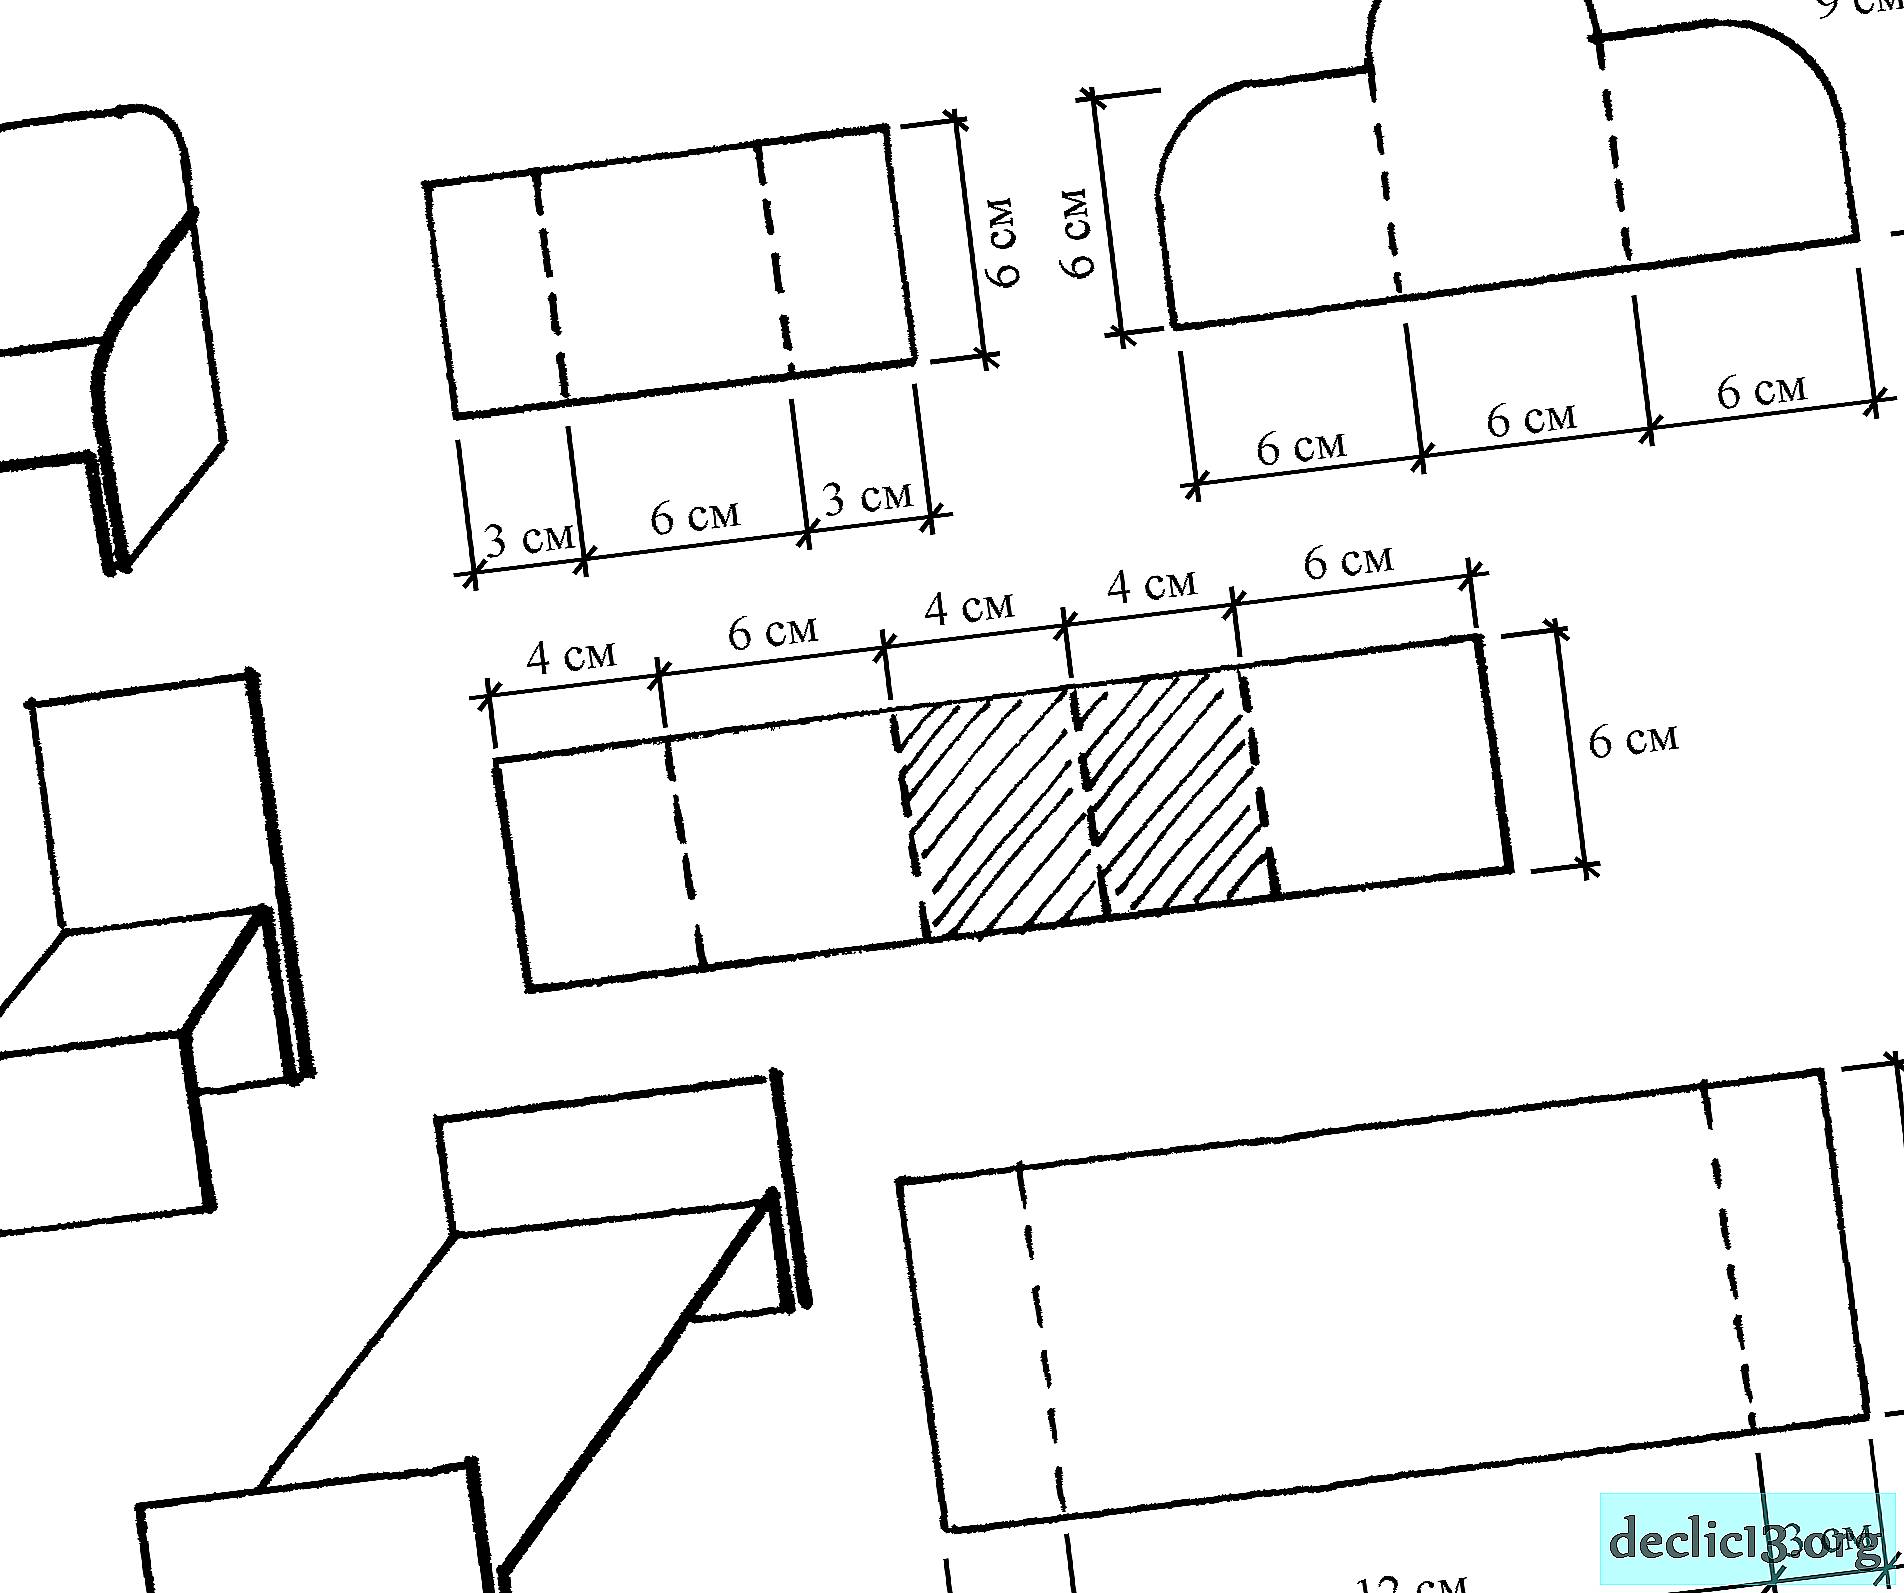
The most optimal and profitable way to create a paper chest is to use matchboxes. They are conveniently put forward, so making an item is not difficult. If you want to make a chest of drawers of paper, then you should use paper blanks. In this chest of drawers it is convenient to store small, lightweight gizmos. This will perfectly include beads, beads, clasps, clips and other little things for creativity and needlework. The top of the dresser can be painted with colored felt-tip pens, giving it an original look.
Designing from a dresser paper consists of the steps:
- Drawing a scheme for creating boxes: this step is skipped if ready-made matchboxes or other blanks are used;
- Cutting schemes along lines, as well as assembling boxes for future chest drawers;
- The entire chest of drawers is glued with cardboard for strength, however, it is not necessary to glue the front part where the boxes will be inserted;
- The facades of the boxes are pasted over with any material - cloth, film, leather, and also attach a bead or button as a handle;
- The legs for the chest of drawers can be made of stationery buttons - for miniature furniture or pipes from toilet paper - for overall products.
Such a chest of drawers is also a good gift for a girl with a lot of jewelry: all jewelry will fit in boxes.
 Make boxes
 Create box items
 Connect the elements
 We decorate the coverings with flaps.
 We glue the facades of the boxes
 Create pens
 Ready chest
Armchair
To make a stylish armchair from colored paper is also not difficult. To create it, you don’t even need glue and adhesive tape, you only need a sheet of paper of the required color. It is worth noting that cutting blanks from beautiful textured paper will give a better result than furniture from ordinary plain material. In addition, if you find patterns that depict pieces of furniture made in different styles, you can make a chair that looks as much as possible like real furniture. To work, you need one sheet of paper in the form of a square. Its dimensions are selected depending on the dimensions of the future product:
- Fold the square sheet in half, then open it and press one of the halves against the center line of the fold;
- Press the second part of the square to the center of the workpiece. Next, walk your hand along all the fold lines to clearly outline the lines formed. Open the blank and turn it upside down to you;
- One part of the 4 received lines must be cut off: this is done using scissors or a metal ruler;
- Fold the blank across the lines, visually outlining the center, bend the triangle to the right. On the left side, do the same, in the end you should get two triangles superimposed on each other;
- The middle strip remaining below is bent over the triangles. Each fold line is additionally smoothed with fingers;
- The strip, which was previously bent up, bends down - it will serve as a seat. The side parts will become supports for the hands, they must be glued from the inside to the seat.
It turns out an original and easy to make chair made of paper. To diversify its surface, you can stick decorative paper imitating the skin on the seat.
 Stage 1-6
 Stage 7-8
Cupboard
The design of the cabinet is similar to the manufacture of a chest of drawers, which was described earlier. The difference will be that the frame should be higher, and besides drawers shelves are needed. Some of the nuances of making a paper cabinet:
- For the workpiece, you need to use a scan from a rectangular sheet of thick paper;
- The ideal size would be A4, if you need a larger product - the sizes are proportionally increased;
- After you draw a diagram, you need to cut it: first, cut out the main elements along the lines, and then proceed to the cutting of overhead valves;
- The model frame is glued without doors;
- Doors are cut from the same paper. Later they can be decorated with a film: an adhesive layer of such a material will allow it to be applied to the base without any problems.
Finally, decorative handles are glued to the doors. Buttons or beads are suitable for this. The legs are made of thick cardboard.

Table
To assemble a table from paper is not difficult, especially if you already have experience with this material. There are many options for creating tables, but beginners should choose a less complicated way. It consists of the following actions:
- For work, a square sheet of paper is used;
- All sides of the square are folded inward, forming mini-squares;
- Each square bends inward, forming triangles;
- Triangles bend outward;
- The final step is the formation of legs.
To refine the countertop, stick beautiful decorative paper on it or paint it with colored felt-tip pens and acrylic.

Dressing
A separate step is to highlight the decoration of finished products. DIY furniture, patterns of which can be found in this material, are decorated as follows.
| Material | Features | What is it suitable for? |
| Self-adhesive paper for furniture | You can use this material in the manufacture of any type of furniture. This film is ideal for beginners, because it is easy to cut, and the adhesive layer allows you to decorate the surface without any problems. | For countertops, seats, chairs, sofas and armchairs, for the decor of cabinet doors and chests of drawers. |
| Use of paints | Paints allow you to be creative, move away from the standards. Using paint, you can draw any pattern and pattern. When choosing a tool, make sure that it does not damage the paper base. Acrylic or aqueous emulsion formulations are preferred. | For all types of crafts, especially for decorating the front parts of products. |
| Fabric application | The fabric allows you to maximally simulate the structure of furniture. | Suitable for sofas, armchairs and chairs. |
If gouache is used for decoration, mix it with PVA glue (1: 1). After drying, the paint will not be printed on the hands, and the product will receive additional rigidity.
Do-it-yourself paper furniture will be a great option for a dollhouse or designing mock-ups for a future interior. The creation of miniature objects is a fascinating activity, to which all family members can be introduced.
 Film
Film Paint
Paint the cloth
Drawings and schemes


